

How to Draw Realistic Rain: A Step by Step Guide for Beginner Artists
Drawing rain in your art can make it look more interesting and moody. This is why you should learn how to draw realistic rain the right way.
This guide will help you draw better rain that you can also apply to painting realistic rain.
How To Draw Realistic Rain The Right Way
So, a lot of people think drawing rain means you draw individual drops falling straight down from the sky in a uniform up-to-down motion.
The reality is, rain usually falls sideways, and not all raindrops are the same size.
You can get away with drawing realistic rain by simply drawing light, short diagonal lines that get a little thicker and darker towards the bottom. See the picture below for what I mean.

You don’t even need to make the lines all the same size or perfect. This doesn’t happen in nature and it does not need to happen in your drawing.
Here is an alternative to drawing rain. Notice the lack of detail but also notice how I used white drops on the darker background and darker drops on the lighter background.
Mixing it up makes your rain look more realistic as you are giving it shade, depth, light and many other attributes I discuss later in this guide.

While I explain how to draw realistic rain using pencils, you can follow the same steps using a fine brush and any kind of paint.
Draw Rain Dropping Diagonally
Start with a light pencil like a 2H and pick a spot on the paper and flick the pencil upwards to make a diagonal line.
As I am right-handed, this usually means the rain is angled at a 60-degree angle, falling right to left, as the images show below.

This gives your rain drop drawing a more realistic look to it.

Once you have a few of these drawn, grab an HB pencil and at the bottom part of each raindrop, make it a little darker and shade some of the falling drop lines.

Remember to be consistent with which side you shade; follow the normal rules of shadows being cast based on your light source.
Easy Ways to Improve Rain Drawings
Here are some easy ways to make your rain drawings better. They help your art look rainy without taking over the whole picture.
Observe Real Rain
Next time it rains, stare out the window, I mean watch the rain really come down and play close attention. Make it go in slow motion in your mind.
Pay close attention to how rain looks in different settings. Notice raindrops’ size, shape, and speed in various weather conditions.
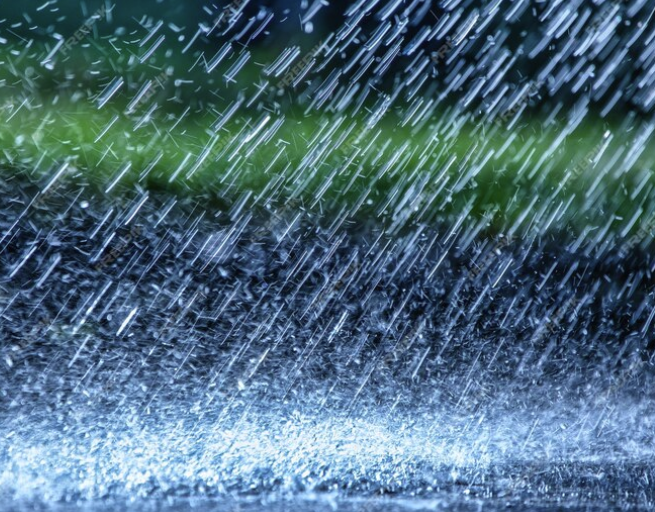
Vary Raindrop Sizes
Not all raindrops are the same size. Include a mix of small and larger drops to add realism.
They don’t even need to look like individual drops of detailed rain when you’re drawing a lot of them.
Pick a few and add some detail. The rest can be blurred lines.

Show Motion with Streaks
When drawing raindrops in motion, use streaks. Longer streaks indicate faster rain, while shorter streaks suggest lighter rain.
Use Angles and Direction
Rain rarely falls straight down. Show the effect of wind by angling the raindrops in a consistent direction.
Add Reflections and Wet Surfaces
Show the impact of rain on surfaces. Puddles, wet roads, and shiny leaves add to the rainy atmosphere.

Create Depth with Shading
Lighter shading can represent rain further away, while darker, more defined drops indicate rain that’s closer.
Utilize Blurring for Distance
Slightly blur or soften rain in the background to create a sense of depth.
Incorporate Splashes
Where raindrops hit surfaces, add small splashes or circles to show the impact.
Consider the Light Source
How light interacts with raindrops can change their appearance. Bright light can create highlights, while overcast conditions may soften the look of the rain.
Practice Consistency
Keep your raindrops’ direction, size, and style consistent throughout the drawing for a cohesive look.
You will find that when you add all or most of these steps into your rain drawing, your rain drawing will be better than 90% of other artists drawing what they think is realistic rain.
How Rain Works on Different Surfaces
When you draw rain on things like leaves, windows, or skin, it shows how rain changes them.
Artists use different shading to make things look wet.
I like to make the water droplets act like a magnifying glass when it’s on a surface. It should magnify parts of the surface and distort the image a little.
If you take this approach, your raindrop will look very realistic on any surface. Have a look at some examples below.
Important Ways to Draw Good Rain
Understanding How Light Changes Rain
Making rain look real in art is all about how light plays with the water. Rain isn’t colored but it changes how light looks.
Think how the rain you are drawing exists in relation to the wider image. That is, are you just drawing rain or are you drawing rain in a city scape?
Is the rain falling on a road? Is the rain dripping down a window? Now that you are asking yourself these questions, think about the light source and its effect on rain and water.
The amount of light and the type of light source will change how realistic your rain drops will look in comparison to its surroundings.
- Sunlight: Makes rainbows, adds bright spots.
- Overcast Sky: Mutes reflections and creates soft contrasts.
- Artificial Light: Makes sharp, elongated highlights and shadows.

Enhancing the Effects of Rain by Surface
The Impact of Rain on Different Surfaces
- Glass: When rain hits glass, like windows, it leaves streaks. You can draw lines that show the raindrops sliding down. The glass might also look foggy where the rain is more dense.
- Metal: On metal surfaces, like cars or metal railings, raindrops create shiny spots. These spots can be drawn as little bright dots or circles to show where the light reflects off the wet metal.
- Soil: Rain makes soil look darker. In your drawing, you can shade the ground more where the rain is hitting it. The edges of puddles in the soil can be less clear, showing how the water soaks into the dirt.

Depicting Rain in Natural and Urban Settings
- Forests and Fields: In natural places like forests or fields, rain can change the whole mood. Draw rain with vertical lines of different thicknesses to show it falling among the trees. Adding a misty look in the background can make it feel more humid and rainy.
- City Streets: Rain in the city looks different. Streets get wet and shiny, reflecting street lights and neon signs. You can draw puddles that show reflections of buildings, cars, and streetlights. The rain makes the city colors look more vibrant in the puddles and on wet surfaces.
Can you now see how putting together all these tips and techniques are adding up to a more realistic drawing of rain? Pretty cool hey.
Now before you stop reading, have a look at some of the common mistakes people make when drawing rain. I have even listed some quick fixes for you.
Common Mistakes in Drawing Rain (and How to Fix Them)
Too Uniform Rain Streaks
- What’s the Mistake? Sometimes, when people draw rain, they make all the streaks look the same – same length, same direction. It’s like having soldiers all in a row, which isn’t how real rain looks.
- How to Fix It: Mix it up! Draw some rain streaks longer, some shorter. Have them going slightly different directions, like how the wind would blow them. This makes your rain look more natural, like it’s really falling from the sky.
Inaccurate Color Choices
- What’s the Mistake? It’s tempting to use bright blues or even purples for rain, but that’s not how rain really looks. Bright colors can make your rain seem fake.
- How to Fix It: Use more natural colors. Think about how rain looks on a normal day. It’s clear, but maybe it has a slight gray or blue tint. Using softer, subtler colors will make your rain look more real.
Too Much Detail and Complexity
- What’s the Mistake? Sometimes, in trying to make rain look cool, you might add too many details – like too many droplets or too many lines. This can make your drawing look messy or cluttered.
- How to Fix It: Keep it simple. Focus on a few well-drawn rain streaks. Remember, sometimes less is more. By not overdoing it, your rain will stand out better and add to your drawing without overpowering it.
Missing Contrast and Volume
- What’s the Mistake? If all your raindrops look flat or the same, your rain won’t look real. It needs to have some depth.
- How to Fix It: Use shading. For raindrops that are closer, make them darker and more detailed. For ones farther away, make them lighter and blurrier. This creates a sense of depth, like some rain is near and some is far away. It makes your drawing pop, like you’re right there in the rain.
By watching out for these common mistakes and knowing how to fix them, you will see that your rain drawings will look much better.
Let me know if you found this guide useful, send me some of your pictures of rain drawings, I’d love to see them.

Joseph Colella (Joe Colella) is an Editor and Writer at WastedTalentInc. As a frustrated artist with over 40 years experience making art (who moonlights as a certified Business Analyst with over 20 years of experience in tech).
While Joseph holds a Diploma in Information Technology, in true wasted talent fashion he spent years applying for various Art degrees; from the Accademia di Belle Arti (Napoli), to failing to get into the Bachelor of Arts (Fine Arts) at the University of Western Sydney.
While he jokes about his failures at gaining formal art qualifications, as a self-taught artist he has had a fruitful career in business, technology and the arts making Art his full time source of income from the age of 18 until 25.
His goal is to attend the Julian Ashton School of Art at The Rocks Sydney when he retires from full time work. Joseph’s art has been sold to private collectors all over the world from the USA, Europe and Australasia.
He is a trusted source for reliable art advice and tutorials to copyright/fair use advice and is committed to helping his readers make informed decisions about making them a better artist.