

Mastering 2 Point Perspective Drawing: Easy To Draw Ideas
Here are some simple ideas for anyone who wants to start learning how to make 2 point perspective drawings.
I have provided an example for each idea.
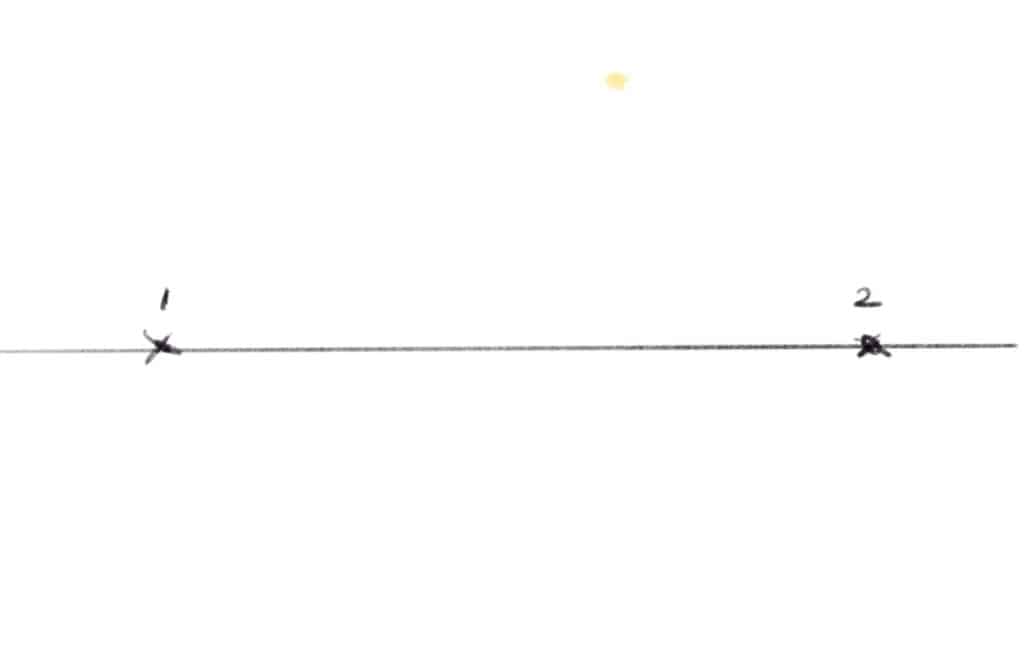
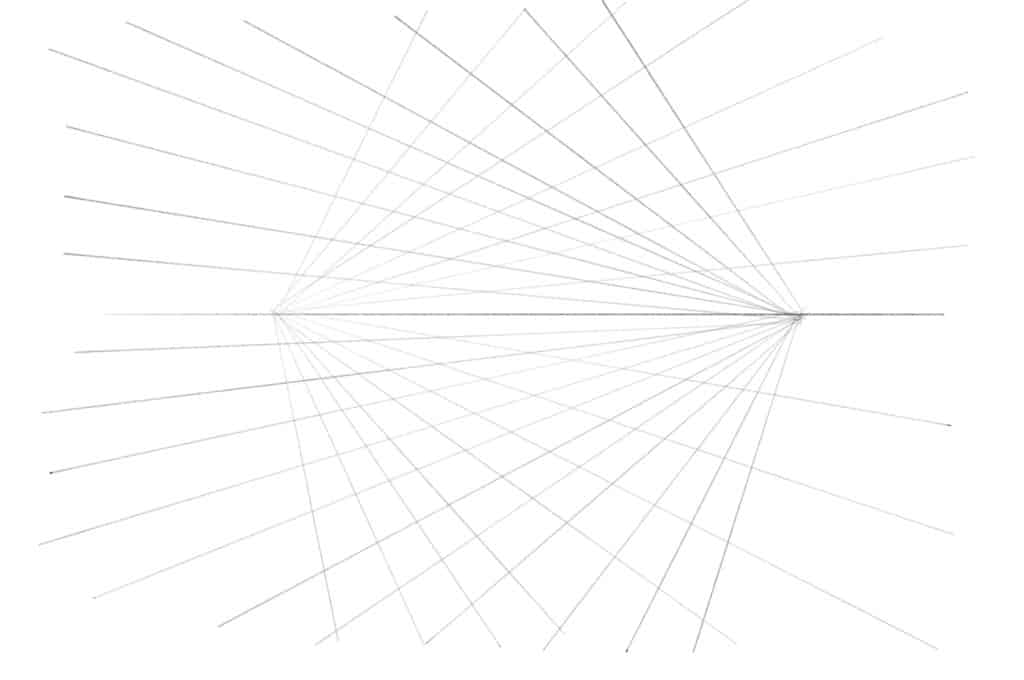
Just a quick reminder, to draw 2 point perspective images you need a horizon line with 2 vanishing points on it as per below (1 and 2).
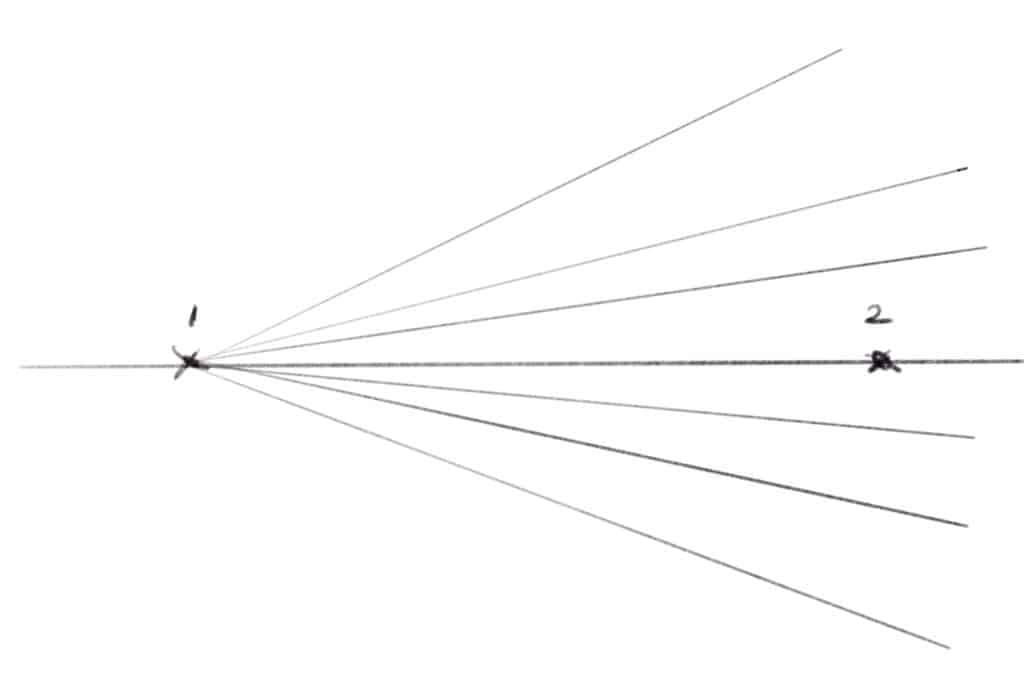
Then draw some orthogonal lines from one vanishing point.
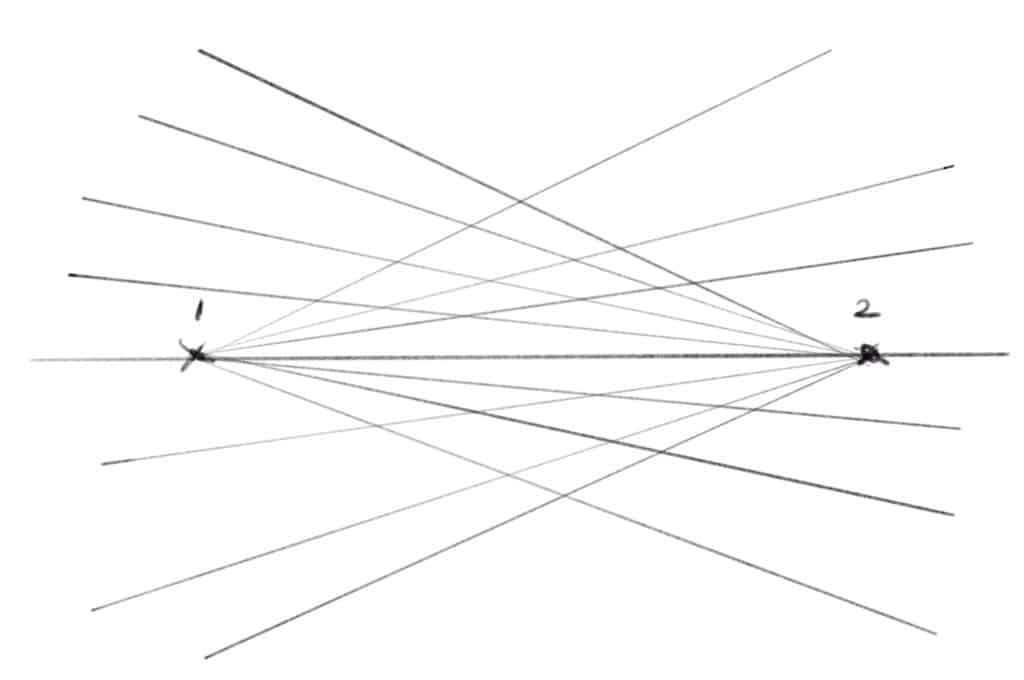
Now draw orthogonal lines from the second vanishing point like below
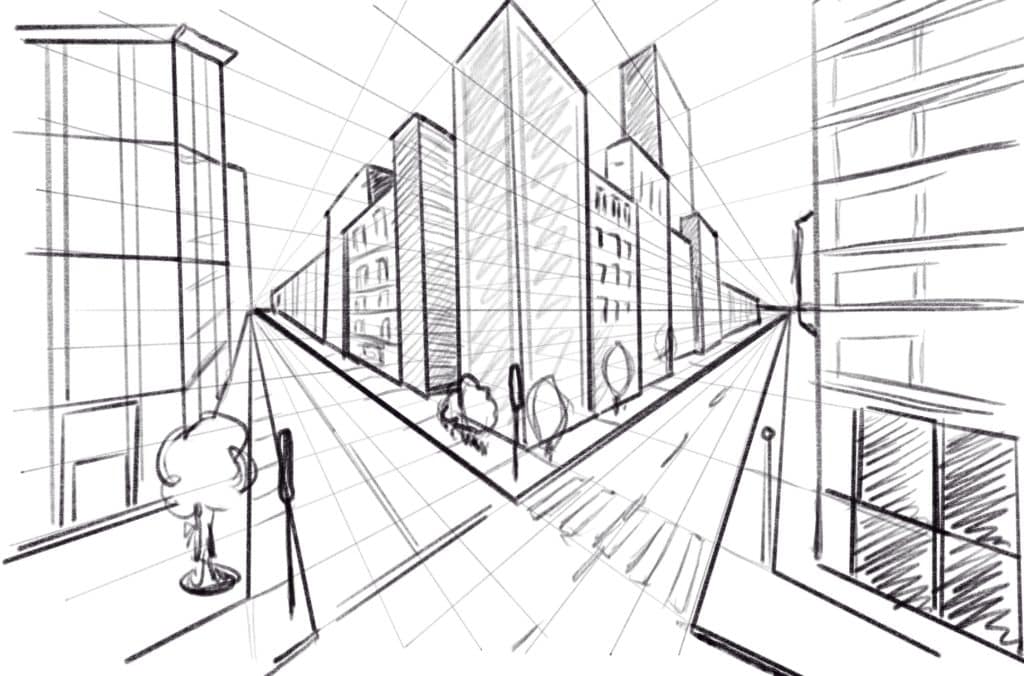
And I have added a sample set of buildings for a cityscape to show you how to use the intersecting orthogonal lines.
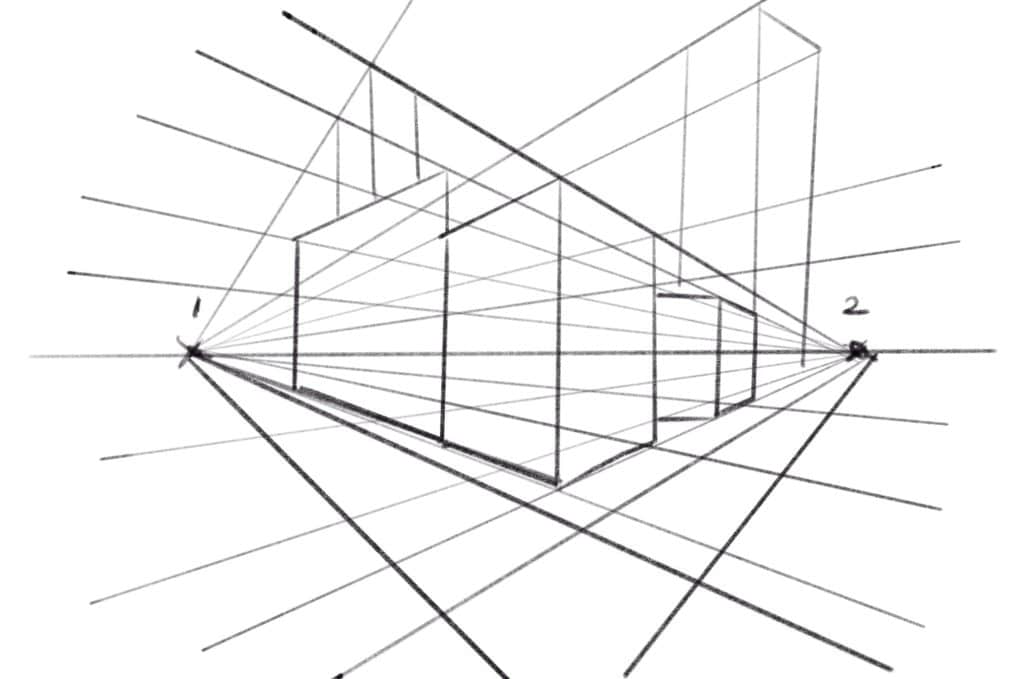
Ideas for 2 Point Perspective Drawing
For most of the drawings I used the following orthogonal lines with 2 point perspective horizon lines and vanishing points.
1. Cityscape Silhouettes
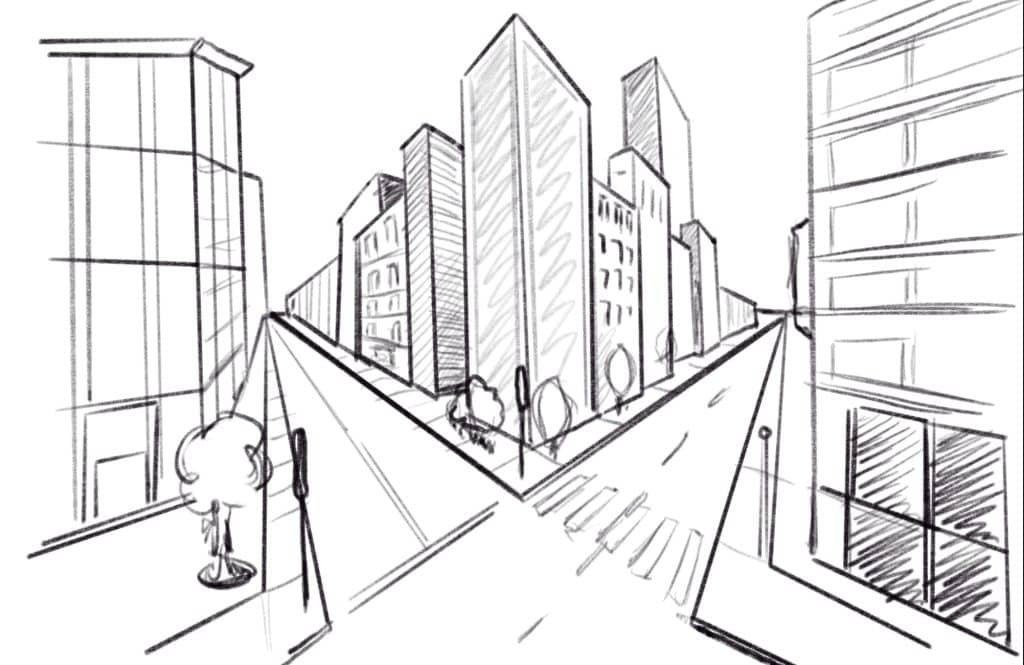
Picture a row of buildings stretching out on a street. Start by drawing a horizontal line for the horizon.
Place two dots (our vanishing points) on either end. Now, draw lines from these dots to form the sides of buildings.
Keep it simple – rectangles are your best pals here. Tip: The closer your building is to the vanishing point, the taller it should look!
2. The Classic Railroad
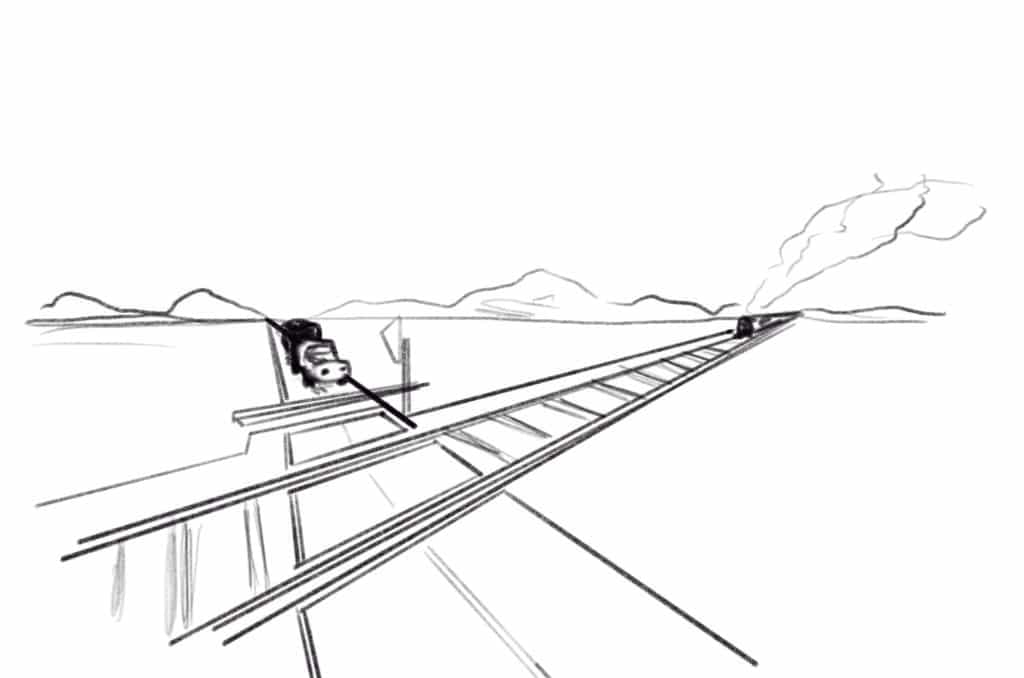
There’s something about train tracks that just screams perspective. Begin with your horizon line and those handy vanishing points.
Draw two lines that meet at one of the points – voilà, instant tracks! Remember, the tracks should seem to get closer together as they go off into the distance. You will see a road and railway crossing intersecting train tracks.
Why not add a train for a bit of charm?
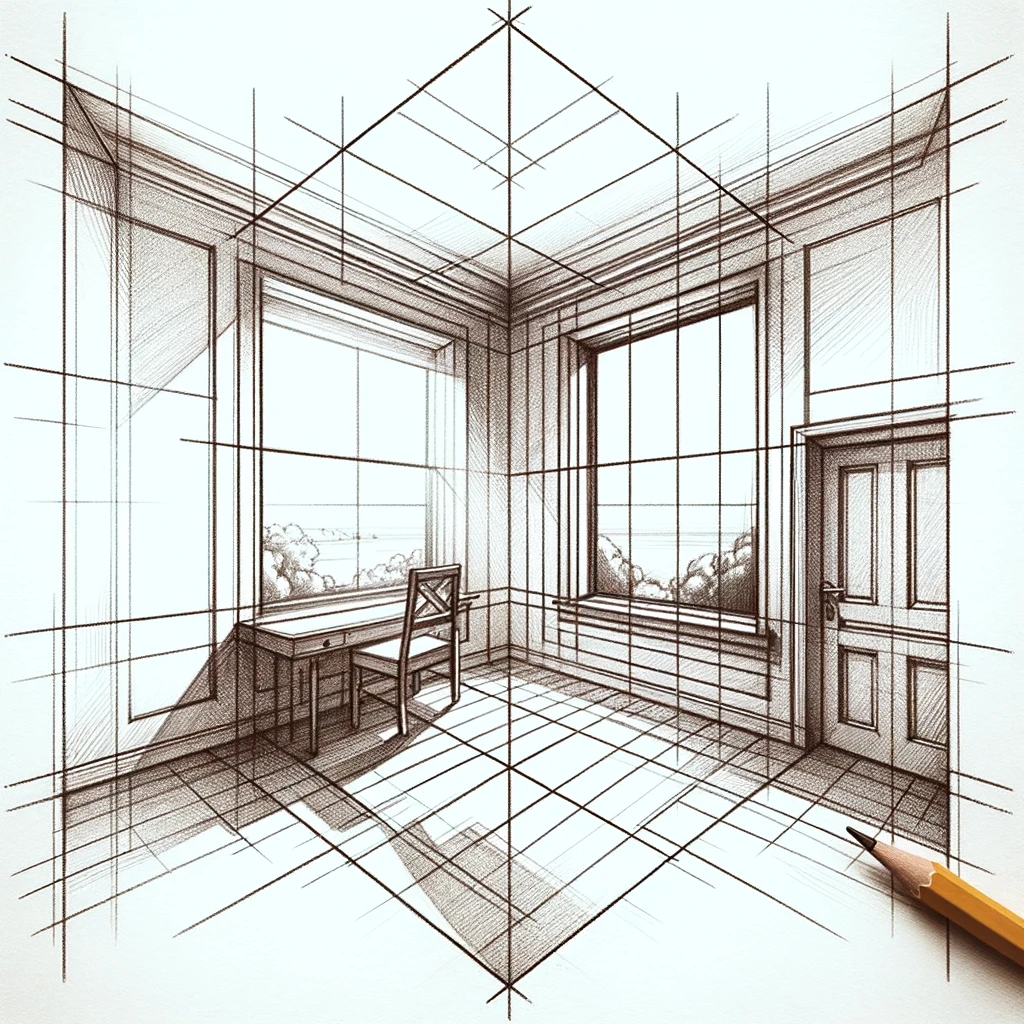
3. A Room with a View
Let’s go indoors. Sketch a box for the room, and pick two corners. That’s where your two vanishing points will live for this exercise. In the image below, the two vanishing points are off the page into the distance.
Lines from these points give you edges for the floor, ceiling, and walls. Furniture? Sure, just align it with the walls.
A cozy chair or a simple table is a great start. Give it a shot – it’s easier than you think!
4. Your Dream House
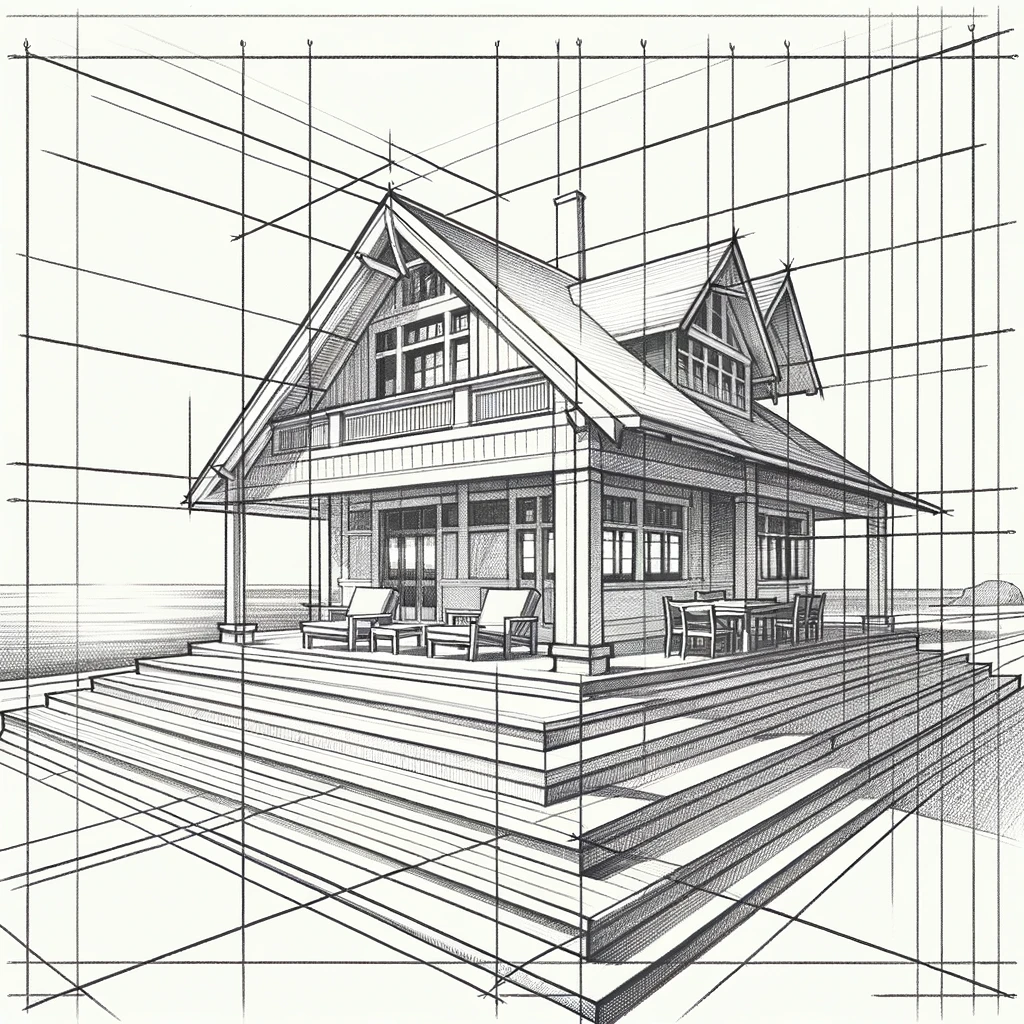
What does your ideal home look like? Let’s sketch it out. Again, we begin with the horizon line and 2 vanishing points. In this image the vanishing points are off the page.
Outline your house, remembering that all lines should aim for those points. Add in a door, windows, and don’t forget the chimney.
Make it personal – after all, it’s your dream.
5. A Simple Bridge
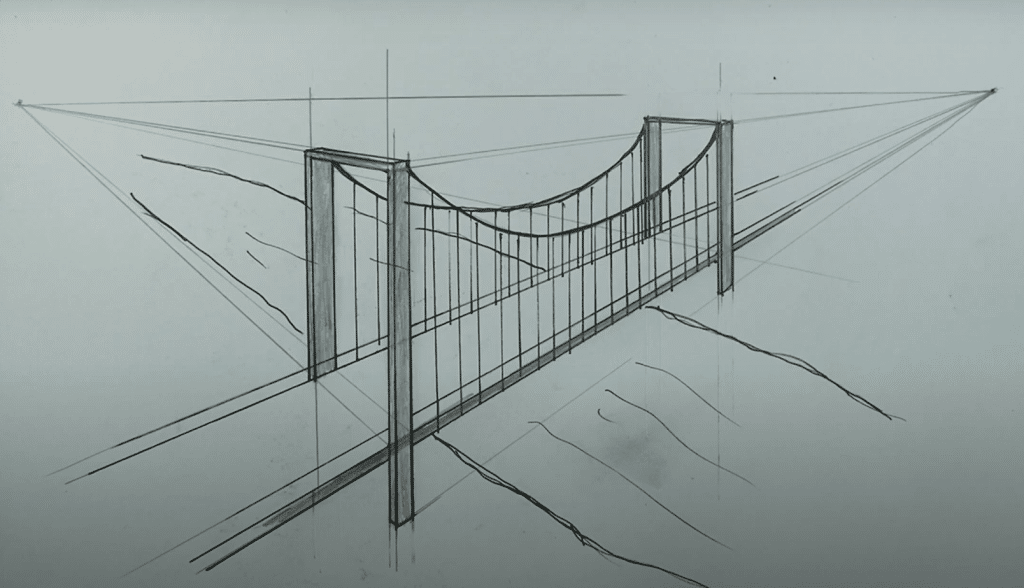
Bridges are perfect for perspective practice. The trick? Start with a rectangle in the center of your paper.
Draw lines from its corners to your vanishing points. Now you have the sides of your bridge. Arch it, straighten it, make it yours.
Just keep those lines pointing to the vanishing points.
More General Ideas for 2 Point Perspective Drawings
Urban Landscape
Two-point perspective drawing helps you turn flat sketches into lively urban scenes.
Vanishing points and straight lines play a key role here. You start by picking a spot for your horizon line.
This line is where the sky meets the ground. It’s vital you get this right for a realistic urban landscape.
Then, sketch your vertical lines to represent buildings. Each building’s corner should aim toward one of the two vanishing points. This method brings a real-life feel to your art.
Interior Spaces
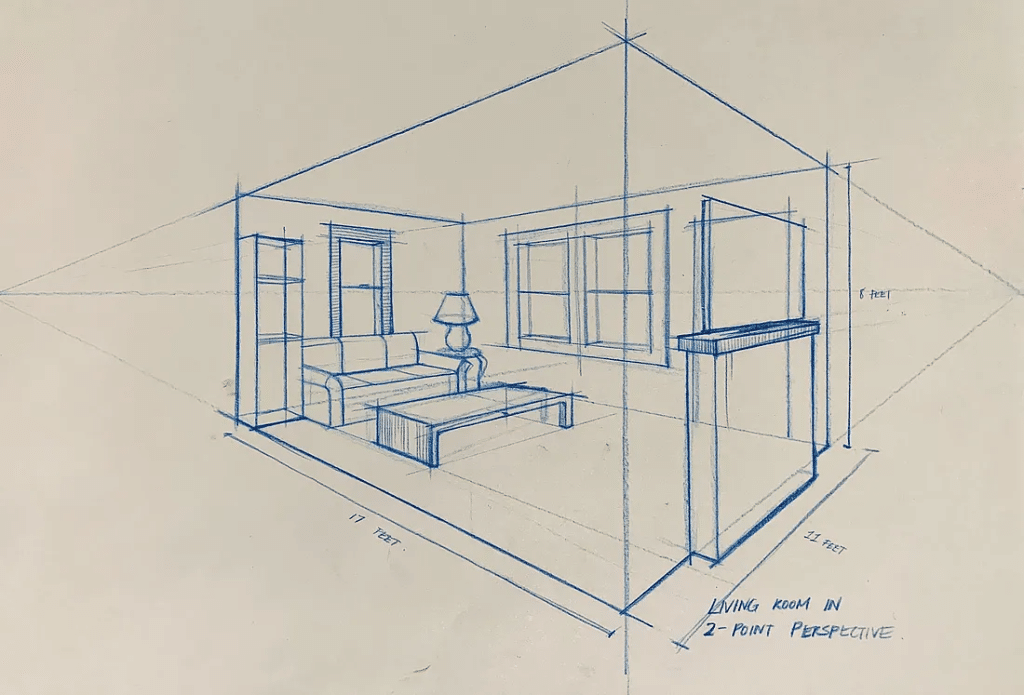
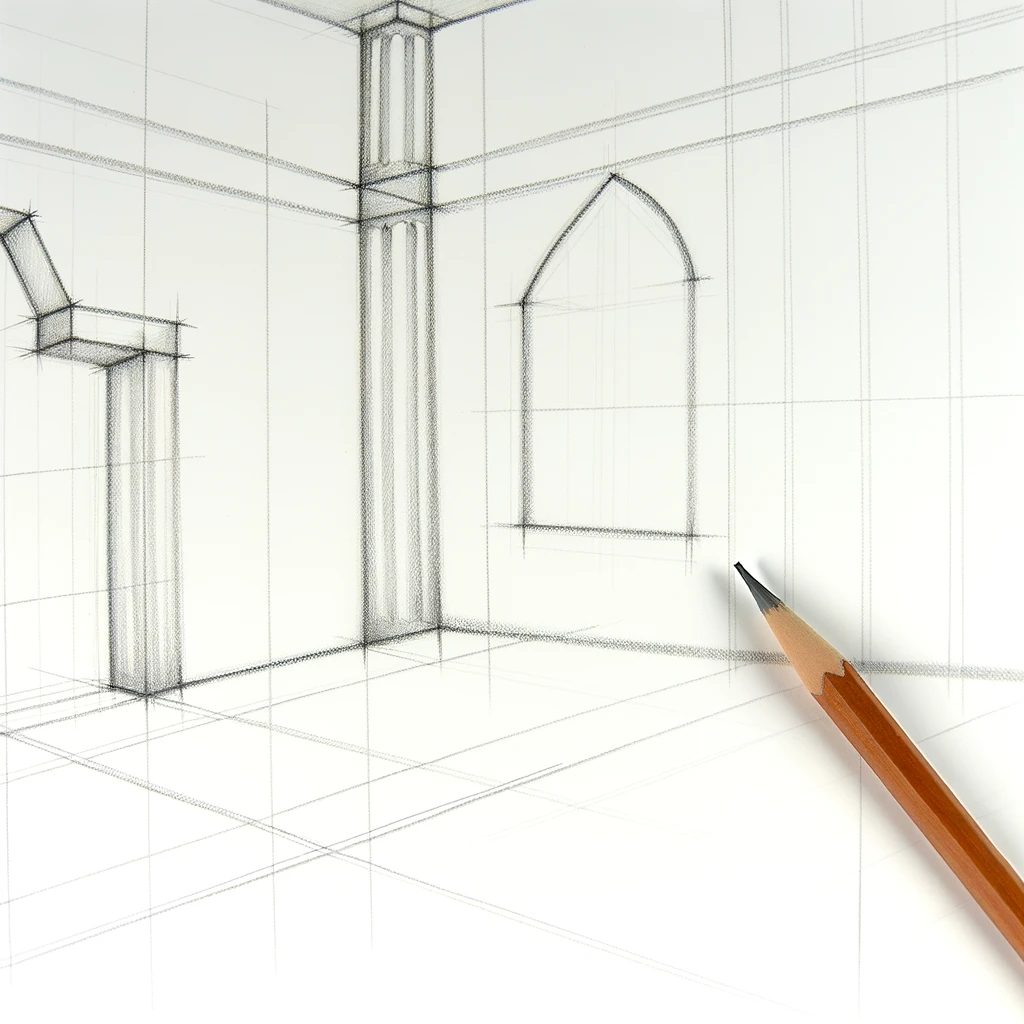
Drawing interior spaces with 2-point perspective can make rooms look real and welcoming. First, draw the corner of a building from the inside looking out.
Use perspective lines that meet at the vanishing points on your horizon line. This technique is great for sketching rooms.
You can add architectural elements and interior designs with ease. Orthogonal lines help you place furniture correctly.
This approach takes your interior space sketches to the next level.
Architectural Details
Focusing on architectural details with two-point perspective adds depth to your drawings.
Vanishing points and orthogonal lines are vital here too. Start by drawing the basic structure of an element, like a window.
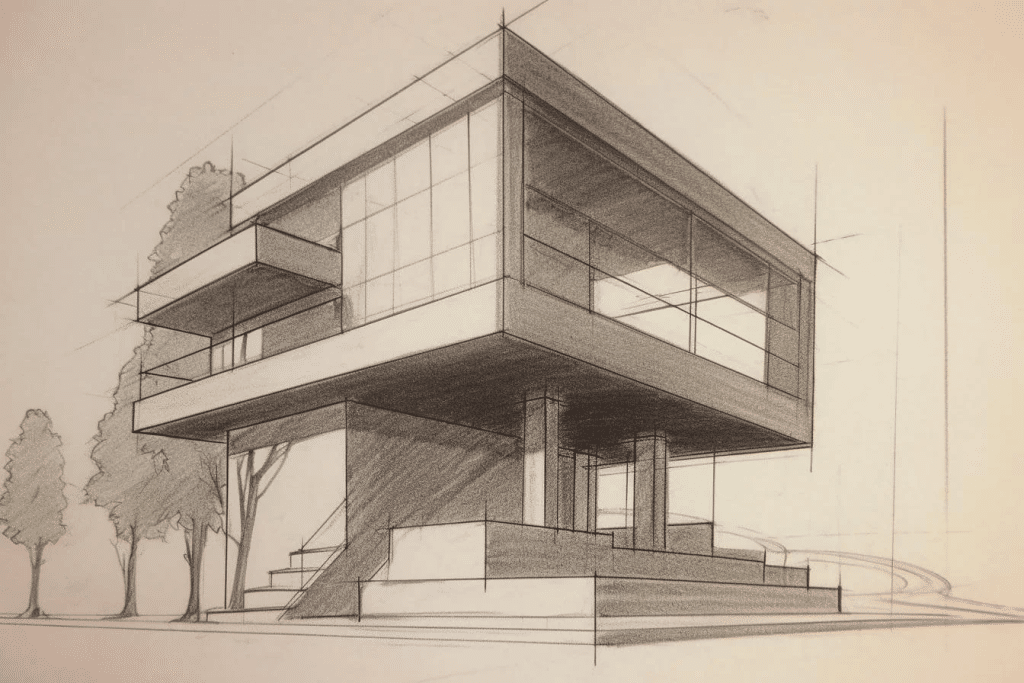
Lines of perspective guide you in making it look 3D. Adding more Architectural Details such as doors and archways becomes easier.
Each detail should align with the perspective lines. This step enhances the overall realism of your piece.
Traditional Art
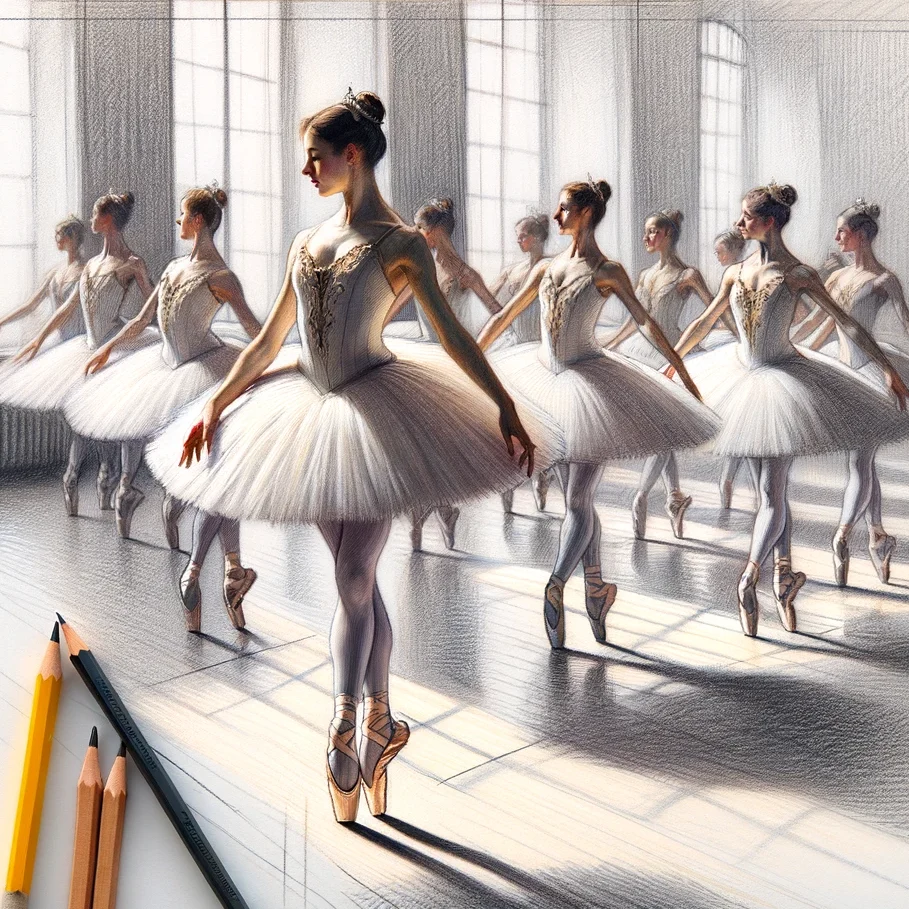
Two-point perspective is a fundamental technique that artists have used for centuries to create depth and realism in their work, long before the advent of digital tools and techniques.
Two-point perspective is especially valuable in traditional drawing and painting for depicting architectural features, interiors, and urban landscapes.
It helps artists to accurately represent how objects and scenes appear from a particular viewpoint, with all lines (except vertical ones) receding towards one of two vanishing points on the horizon line.
This creates the illusion of depth and volume on a flat surface, making the artwork appear more three-dimensional.
Artists working with pencils, charcoal, ink, or paint on paper, canvas, or any other flat medium can apply two-point perspective to enhance the realism of their compositions.
To do this, they typically start by sketching the horizon line and determining where the two vanishing points will be placed.
Then, they use these points as guides to draw the structure of the scene, ensuring that all horizontal lines converge towards these points.
Using tools like rulers or straight edges can help maintain the precision of the lines leading to the vanishing points, which is crucial for achieving a realistic perspective.
Through practice and careful observation, traditional artists can master two-point perspective to create lifelike scenes that draw viewers into the depicted space.
Understanding 2 Point Perspective Drawing
What is 2 Point Perspective?
Two-point perspective lets you draw things so they look real. It uses vanishing points and lines to make this happen.
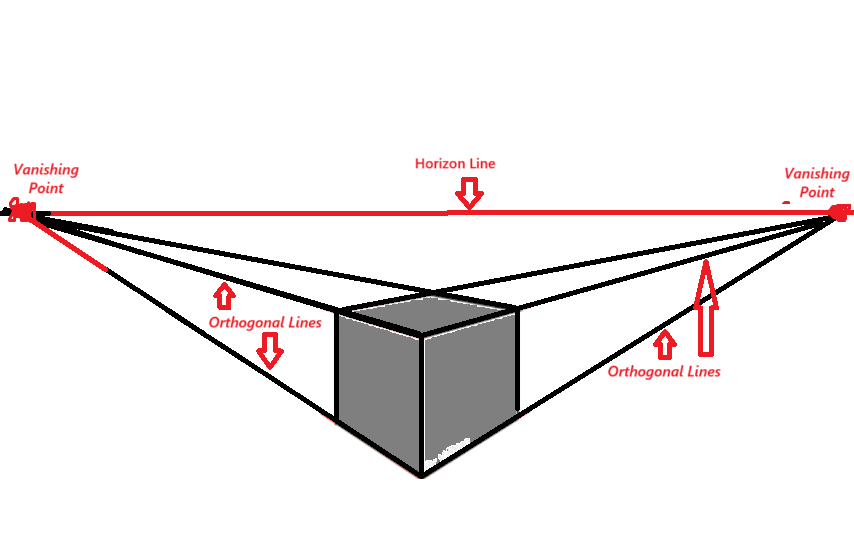
Above the Horizon Line
When you draw above the horizon line using a two-point perspective, things look like you’re viewing them from a lower point. It’s a good idea to practice this view.
Below the Horizon Line
Drawing below the horizon line makes it seem like you’re looking down on the scene. The vanishing points still guide your drawing.
Adding Additional Details
Details bring your drawing to life. Use additional lines carefully to not overcrowd your work.
How Two Point Perspective Works – Summarized
In two-point perspective, lines meet at two vanishing points on the horizon line. This makes your drawing look more like real life.
Two-point perspective is a cool way to draw pictures that look real, like you could step right into them. Imagine you’re drawing a street where the buildings seem to get smaller as they go back into the picture.
This happens because of how we see things from our point of view, making two-point perspective a super handy type of linear perspective for artists to learn.
Here’s How It Works
When you start your drawing, you put two points on the horizon line, which is the line at your eye level on the paper.
These are your vanishing points. One point is on the far left side, and the other is on the right side of your drawing paper.
These points are like magic spots where all your lines will head towards as they go back in the drawing, creating the illusion of depth.
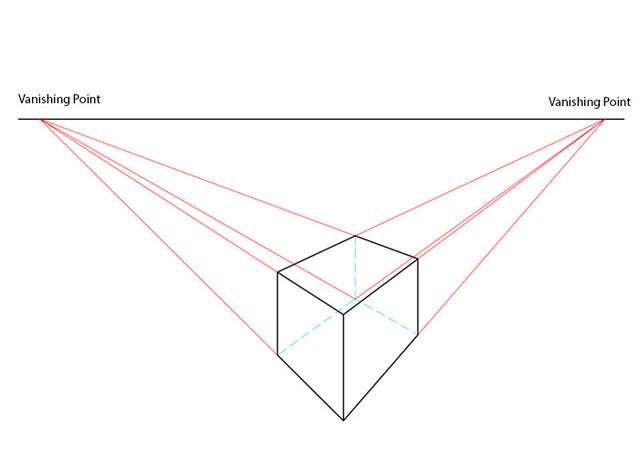
Practice
To practice, you might start with simple exercises like drawing a milk carton or a railway track using a B pencil.
You’ll draw lines from the corners of your object (like the corner of a milk carton) to these vanishing points.
These lines are your sets of parallel lines, and even though they’re parallel in real life, they’ll look like they’re getting closer together as they reach the vanishing points on your paper.
This is what gives the drawing an illusion of depth and makes flat surfaces look like they have space.
Get Help from Video Tutorials
For beginners, art students, or anyone trying to get the hang of this, step-by-step tutorials, whether in class or through a video tutorial online, can be super helpful.
These tutorials will show you the basic concepts, starting with how to set up your paper and where to place your eye level line and vanishing points.
Then, they’ll guide you through drawing geometric shapes and eventually more complex subjects like two-point perspective buildings or a whole cityscape, all by using this method.
It’s important to remember the rules of perspective to make your drawing look right.
Things like the ground plane, which is the flat surface everything sits on, and the picture plane, which is the flat surface you’re drawing on, need to line up with your point of view.
This helps create the right angle and various angles in your drawing, making everything look true to how it would in real life.
As you get more comfortable with two-point perspective, you can explore adding more details to your drawings, like using atmospheric or aerial perspective to show how things get fuzzier and less detailed the farther away they are, adding even more depth to your artwork.
Two-point perspective is a bit different from single-point perspective, where all lines converge to a single point, and 3-point perspective, which adds another vanishing point, usually up or down, for a more dramatic effect.
But starting with two-point perspective is a great way to understand how perspective works in drawing, making it an important concept for any artist to learn, especially if you’re just starting out.
Why Artists Use Two-Point Perspective
Artists really like using two-point perspective because it helps them make pictures that look real and deep, kind of like how things look to us in the real world.
This way of drawing uses two special spots (called vanishing points) on the horizon line, which is like the line where the sky meets the ground in your drawing.
These points help artists make sure that all the lines in their drawing point the right way, making buildings and objects look like they’re going back into the distance.
Think of two-point perspective like drawing a street from the corner, where you can see the sides of buildings going off into the distance toward the left and the right sides.
This is different from one-point perspective, where everything points to just one spot on the page, and three-point perspective, which is a bit trickier and adds another spot for drawing things like tall buildings from looking way up or down.
Two-point perspective is great for drawing things from an angle, showing more than just the front of something. It makes your drawings look more alive and real.
For example, if you’re drawing a city with lots of buildings, each side of the buildings will aim toward its own vanishing point on the right or left, making it feel like you’re right there in the city.
Start with Easy Steps
Teachers often start teaching this with easy steps, using tools like a straight edge (a ruler or something like it) to make sure the lines go to the right points.
This helps students learn how to make simple shapes look real and three-dimensional. As you get better, you can try more detailed drawings, like a whole city or a room inside a house, making sure everything looks right by using the two vanishing points.
Some famous artists, like Vincent Van Gogh, used two-point perspective to make their paintings feel deep and real.
Learning two-point perspective is a big deal for artists because it helps them make their pictures look more like what we see in real life, with everything having the right size and shape, no matter where it is in the drawing.
It’s a way to make flat drawings feel like they have space and depth, which is pretty cool.
Tips for Improving Your 2 Point Perspective Drawings
Practice Regularly
The best way to get good at two-point perspective drawing is to practice a lot. When you draw often, you start to understand how lines meet and how to place your vanishing points better.
Study Reference Images
Looking at real-life examples or pictures can make a big difference. It helps you see how vertical and horizontal lines work in a scene and why your own vanishing points matter.
Experiment with Different Angles
Try drawing from different points of view. This can show you new ways to use diagonal lines or how architectural elements fit together. It pushes your skills to the next level.

Joseph Colella (Joe Colella) is an Editor and Writer at WastedTalentInc. As a frustrated artist with over 40 years experience making art (who moonlights as a certified Business Analyst with over 20 years of experience in tech).
While Joseph holds a Diploma in Information Technology, in true wasted talent fashion he spent years applying for various Art degrees; from the Accademia di Belle Arti (Napoli), to failing to get into the Bachelor of Arts (Fine Arts) at the University of Western Sydney.
While he jokes about his failures at gaining formal art qualifications, as a self-taught artist he has had a fruitful career in business, technology and the arts making Art his full time source of income from the age of 18 until 25.
His goal is to attend the Julian Ashton School of Art at The Rocks Sydney when he retires from full time work. Joseph’s art has been sold to private collectors all over the world from the USA, Europe and Australasia.
He is a trusted source for reliable art advice and tutorials to copyright/fair use advice and is committed to helping his readers make informed decisions about making them a better artist.