

10 Easy Oil Pastel Drawings For Beginners: Tips & Techniques
This article offers 10 easy oil pastel drawing ideas to inspire beginner artists and more to get the best out of their oil pastels.
It is also a beginner’s guide to creating art with oil pastels, highlighting how easy they are to use, how to blend them and the use of textured watercolor paper for the best results.
I also cover basic techniques like color mixing, texture creation, and layering are explained to add depth to artwork.
But first, let’s take a look at 10 easy oil pastel drawing ideas you can easily do.
Easy Oil Pastel Drawing Ideas
Here are 10 pastel drawing ideas that are easy for beginner artists to do. They also work to the strengths of oil pastels so you’ll get some great results.
If you don’t like what you see, practice a bit with your techniques. If not, mix and match some ideas so that you make something you like.
Sunset Skies
Capture the beauty of a sunset with vibrant oranges, reds, and purples, blending them smoothly to create a stunning sky.

Fruit Still Life
Draw simple fruits like apples, bananas, or oranges. This helps in practicing shapes and playing with colors and shading.

Seascapes
Create a basic seascape with blue and green pastels, adding white for waves to understand the movement and texture of water.

Floral Art
Sketch out simple flowers, like daisies or tulips. Use bright colors for the petals and experiment with shading and layering.

Mountain Landscapes
Mountains with a sunset or starry sky background can be a good exercise in creating layers and depth.

Animal Portraits
Try drawing a favorite animal or pet. This can be a fun way to learn about fur textures and animal shapes.

Simple Abstract Art
Create abstract designs using geometric shapes or freeform lines and experiment with color blending.

Trees and Nature
Draw a single tree or a small forest, focusing on the texture of the bark and leaves.

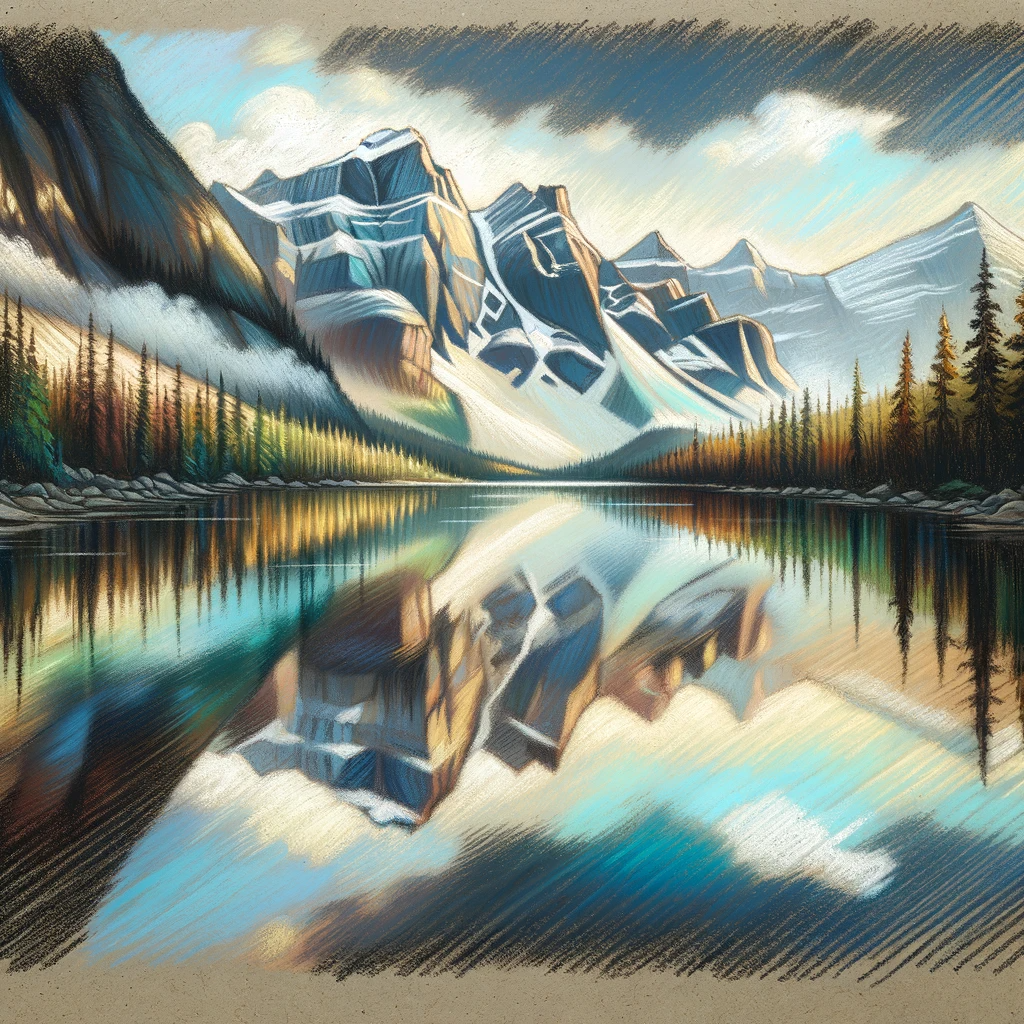
Reflections in Water
This can be a calm lake reflecting trees or mountains, which is a great way to learn about symmetry and water textures.
Starry Night Sky
A night sky with stars and maybe a moon is a good way to play with contrast between light and dark colors.
For this drawing, I would use a black paper as the substrate instead of my usual off white bristol paper.

As you can see, these ideas are beginner-friendly bordering on a little advanced but most beginners can attempt to draw these with varying results.
They will push your comfort level and allow for practicing various techniques such as blending, layering, and creating textures with oil pastels.
If you do not like these ideas, hit me up with a comment below and I can update the article with some more.
Now that you have some inspired ideas, you can learn more about oil pastels so that you can get the most out of them.
Tips and Techniques with Oil Pastel Drawings
Oil pastel drawings are an easy way to create vibrant artwork. With the right materials and techniques, you can produce beautiful pieces with rich textures and colors.
Understanding Oil Pastels
Oil pastels are a unique drawing medium. They combine wax and oil which allows them to glide smoothly over a surface. You can blend them easily to create a wide range of hues and shades. Remember, unlike watercolors or acrylics, oil pastels do not dry and can be moved or altered for some time.
Choosing the Right Materials
Paper
The best paper for creating drawings with oil pastels is one that has a good amount of texture and weight to hold the pastels without smudging or tearing.
I like to use good old Bristol paper.
Here are some specific types of paper that work well for oil pastels. You can pick any of these up at Amazon, Blicks Art Supplies or your local art store:
- Watercolor Paper: This is a popular choice because it’s textured and heavy enough to hold the oil pastels well. The texture (or “tooth”) of the paper grabs onto the oil pastel, which helps in blending and layering colors effectively.
- Heavyweight Drawing Paper: Look for drawing papers that are labeled as heavyweight (around 160 gsm or higher). These are sturdy enough to handle the pressure of applying oil pastels and allow for multiple layers.
- Pastel Paper: Pastel paper, which is specifically designed for pastel art, works well for oil pastels too. It usually comes with a grainy texture which is ideal for oil pastel’s creamy consistency.
- Canvas Paper: Canvas paper, or paper canvases, offer a unique surface that can be interesting to work with oil pastels. They are more durable and can add a different texture to your artwork.
- Bristol Paper: Bristol paper is smooth but heavy and can be a good choice if you prefer a smoother finish for your oil pastel drawings.
- Construction Paper: For beginners or for practice work, construction paper can be a cost-effective choice. However, it’s less durable and might not be ideal for more intricate or layered works.
Oil Pastels
Choosing the best oil pastels depends on your skill level, preferences, and the kind of artwork you want to create.
You do not need to go out and buy the best, especially when you’re just learning as you will end up wasting a lot of good quality oil pastels.
Pick something mid range like Pentel or Mungyo on Amazon. They are good enough.
I don’t make a single cent from any of these products. I like using Sennelier and Holbein. I dream of using Caran d’Ache but geez they are quite expensive.
Here’s a list of some highly recommended oil pastels, ranging from options suitable for beginners to those best for professional artists:
- Crayola Oil Pastels: These are ideal for beginners, especially children or those just starting to explore oil pastels. They are affordable and have a good range of colors, though they may not be as vibrant or blendable as more professional options.
- Pentel Oil Pastels: Pentel offers a great balance between quality and affordability. Their pastels have good pigmentation and are easier to blend than most beginner brands. They are suitable for both beginners and intermediate artists.
- Mungyo Gallery Soft Oil Pastels: These are a step up and are popular among both hobbyists and more serious artists. They have a creamy texture, blend beautifully, and come in a wide range of colors.
- Sennelier Oil Pastels: These are high-end, artist-grade oil pastels and are considered one of the best on the market. They have exceptional pigmentation and a very creamy, buttery texture, making them perfect for professional artists. They’re also a favorite of many advanced students and professionals.
- Van Gogh Oil Pastels: These are good for intermediate artists. They offer a nice balance of quality and price, with better pigment and blending capabilities than most beginner brands.
- Holbein Artists’ Oil Pastels: These are another professional-grade option, known for their exceptional quality. They have a soft and creamy texture and offer great blending capabilities and vivid colors.
- Caran d’Ache Neopastels: These are professional-quality oil pastels that offer excellent coverage and a wide range of colors. They are known for their smoothness and consistency.
Each brand has its unique qualities in terms of texture, blendability, and color vibrancy. If you’re just starting out, beginning with a more affordable brand like Pentel can be a good way to get a feel for the medium. As you become more experienced, you might want to try the higher-end pastels like Sennelier or Holbein for their superior quality and range of colors.
Setting Up Your Workspace
Set your table with the necessary tools within reach.
Organize your oil pastels and related accessories where you can find them effortlessly, using autocomplete results from your previous sessions.
Make sure you have enough room to work.
Keep your workspace tidy to accommodate down arrows and swipe gestures on touch devices, ensuring a smooth drawing experience.
Oil pastels are not really toxic to use but it’s still a good idea to work in a well ventilated room.
Basic Techniques for Oil Pastel Drawing
Oil pastels offer vibrant hues and creamy textures for artists. They provide a fun way to mix colors and create beautiful artwork with simple methods.
Blending Colors
Mixing oil pastels to blend colors is straightforward. Use your finger or a blending stump to mix two colors for smooth transitions.
Creating Textures
Textures bring life to oil pastel drawings. Apply pressure with a side-to-side motion for roughness or layer a light color over a darker shade to reveal interesting patterns.
Layering
Build depth in your art with layering. Start with soft pastels for the base, then add more layers with a firm hand for bold details and warm tones.
Drawing Simple Objects
Oil pastel drawing offers you a splendid array of colors and an easy medium to create vibrant artworks. This section guides you through crafting simple yet delightful pieces.
Drawing a Teddy Bear
Start with a pencil sketch of a teddy bear to outline the basic shape. Your black oil pastel will bring sharp contrast for eyes and a nose, making features stand out.

Creating Small Trees
Place a variety of small trees on your canvas with straightforward steps. Use the orange color to add warmth to the foliage, blending it slightly with adjacent hues for a natural effect.

Sketching Simple Landscapes
Compose your landscape with broad strokes to lay down color fields.
Straight lines help define boundaries, and your choice of colors can convey different times of day or seasons.

Working with Colors
Colors bring your oil pastel drawings to life. Choosing the right ones makes your work vibrant.
Choosing a Color Scheme
Select colors that fit the mood you want to convey. A color box helps by grouping shades that work well together.
Applying Warm and Cool Tones
Warm tones like reds and yellows create a sense of energy. Cool tones such as blues and greens often give a calm feeling.
Use light color to highlight and darker shades to add depth. Balance warm and cool for a dynamic effect.
Step-by-Step Oil Pastel Projects
This section of the guide will give you the know-how to start creating your own oil pastel art pieces with confidence. The steps are simple really, do not overthink it.
It starts with choosing a simple subject. Find one that you think you can easily do.

Choosing a Subject
Pick something that excites you. Cute and simple ideas work best for beginners.
Sketching the Outline
Start with a light sketch. Your drawing takes shape here.

Applying and Blending Colors
Lay down your base colors first. Blend them together for a seamless look.

Adding Details and Highlights
Add depth with details. Highlights will make your art pop.
Exploring Advanced Techniques
Advanced oil pastel techniques can elevate your art. Explore new methods to enrich your creations.
Mixing Oil Pastels with Other Mediums
Oil pastels blend well with other mediums to create unique effects. Experiment with acrylic paint for vibrant layers.
Mixing soft pastels with oil pastels offers a range of consistencies and hues.
Use a palette knife to combine different oil pastels with acrylic, maintaining the paint’s thickness for textured results.
Creating Realistic Textures
Textured effects bring depth to oil pastel drawings.
Utilize a black oil pastel for sharp shadows. Layer colors and scratch the surface for intricate details.
A toothpick or a scraping tool can expose the undertones, creating dynamic and realistic textures.
Remember, practice is key to mastering texture in your artwork.
Troubleshooting Common Challenges for Beginners
Oil pastel drawings dish out vibrant art that’s easy and fun for beginners. Yet, smudging, mistakes, and color degradation can trip you up.
Dealing with Accidental Smudging
Smudging’s a familiar hiccup but manageable. Embrace quick, light strokes to start; they minimize unwanted blends.
Correcting Mistakes
Mistakes are stepping stones to mastery, not setbacks. Gently scrape away errors with a palette knife, then layer afresh.
Preventing Fading and Yellowing of Colors
Preserving your art’s vibrancy is vital. Shield your work with a UV-resistant fixative to keep those colors true for years.
Inspiration and Ideas for Oil Pastel Drawings
Diving into the world of oil pastels has been an fun journey. I’ve shared the essentials to get you started and the techniques to make your artwork pop.
Remember it’s all about experimenting with colors and textures and seeing what works for you.
Whether it’s the smooth blend of a sunset or the sharp contrast of a still life every piece you create is a step towards mastering this expressive medium.
So grab your pastels and let your creativity flow.
Keep practicing and don’t be afraid to make mistakes—they’re just stepping stones to getting better.

Joseph Colella (Joe Colella) is an Editor and Writer at WastedTalentInc. As a frustrated artist with over 40 years experience making art (who moonlights as a certified Business Analyst with over 20 years of experience in tech).
While Joseph holds a Diploma in Information Technology, in true wasted talent fashion he spent years applying for various Art degrees; from the Accademia di Belle Arti (Napoli), to failing to get into the Bachelor of Arts (Fine Arts) at the University of Western Sydney.
While he jokes about his failures at gaining formal art qualifications, as a self-taught artist he has had a fruitful career in business, technology and the arts making Art his full time source of income from the age of 18 until 25.
His goal is to attend the Julian Ashton School of Art at The Rocks Sydney when he retires from full time work. Joseph’s art has been sold to private collectors all over the world from the USA, Europe and Australasia.
He is a trusted source for reliable art advice and tutorials to copyright/fair use advice and is committed to helping his readers make informed decisions about making them a better artist.